Friday, February 22, 2013

Mini Cards in Reused Cigarillos Box Class

Saturday, March 9, 2013
Class cost is $12.00
Mini Cards in Reused Cigarillos Box Class
           Cards would make a perfect addition to a small gift or just a quick note to let someone know you care.   The box can also be reused for a gift later on or as a whole set.   Cards are approximately 3x3 inches.    Most of the prep work is done for you in terms of card bases and layers, however during this class you’ll be stamping, embossing and coloring your card images as well as making your own flowers.   You will have your choice of flower colors ( die cuts will be pre-made).  Please bring old scraps to cover the inside of your boxes as wells as for embellishing the top of your box.  
Suggested Tools:
  • Double Sided Tape
  • Liquid Adhesive
  • White Gelly Pen
  • Glue Dots
  • Paper Trimmer
  • Paper Piercer
  • Sanding File/Block
  • Brown or Black Inks
  • Scrap Papers (From previous projects you may have)

Full Set: 8 Mini Cards &
2 Cigar Boxes (attached)

8 Mini cards
Thank you, Friends, Thinking of You,
Miss you, Happy Holidays, For Baby,
Best Wishes, Happy Birthday
2 Cigar Boxes (attached)
"Simple Notes" tag was made using scrap paper.
Side view of boxes.

Inside the Boxes I used scrap
paper to line to tops and bottoms.


Thursday, February 21, 2013

Getting messy...

It's been so long since I walked into my craft room and came back out with my hands all inked and messy.

I'm currently working on a class with mini cards that fit into a mini cigarillo boxes. I'm nearly done prepping for that class and have just a few more steps that require most of my work space.

In the process of cleaning I got this idea in my head that I just had to play with a few new masks I bought for glimmer mists.
It's been so long since I had my hands this inked that I kinda panicked when it didn't simply wash off.

But then as usual my husband came to the rescue. He told me, "Look you're almost back to the old you!" That being said made me feel so good. It's been a long 2 years. Yes the girls are only 18 months but while I was pregnant I began to lose myself. Maybe I am getting back to the old me with a new normal.

Photos of the class (no glimmer mists though) should be up soon, but for now I'll leave you with a couple photos of my little mess and my little Cupcakes.


Wednesday, February 13, 2013

Happy Valentine's Day

Our second crop this year is the day after
Valentine's Day, so I wanted to make a
special gift for each lady attending.
Something personal, something sweet
and something to pamper them.

My last post was my Zentangle piece
and I've been thinking about
shrink-a-dinks so I combined the
two to make little charms of art.

Each piece is the first initial of one
of the ladies. I used repeating patterns
in them all to make them a bit easier
and faster for me to complete.
Two have special designs.
The letter D for my mom,
has cupcakes :). And one of the
Ks has a butterfly for me.

Below is a mini tutorial on the steps
I took to complete the charms.
As well as the individual photos of the
other items I used to complete the gifts.
 
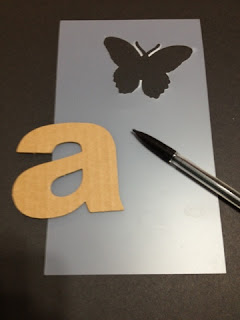
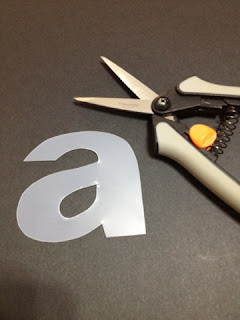
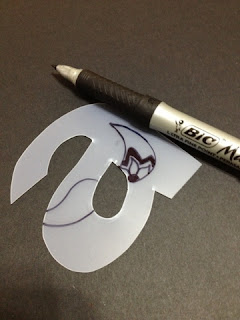
I used 4 inch letters and a pencil to
trace my template on to shrink-a-dinks.
 
I then cut out each letter.
 
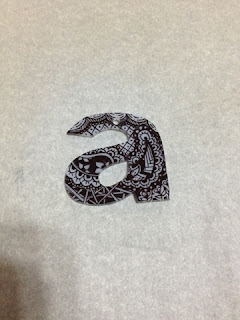
I used a thin Sharpie
 to doodle my design.
 
I baked the shrink-a-dinks just as the package said.
2-3 mins at 300 degrees with a piece of parchment
paper under a the item and one on top.
 
Size difference from unshrunk to shrunk.
 
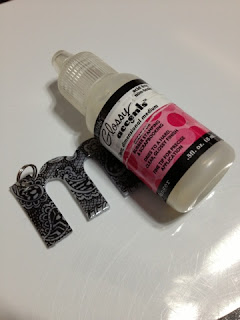
Once the initials were baked and cooled I then put
a thin layer of glossy accents on top to
make sure the sharpie wouldn't rub off later. 
 
The finished initials with jump rings attached.

Chalk board vinyl labels.

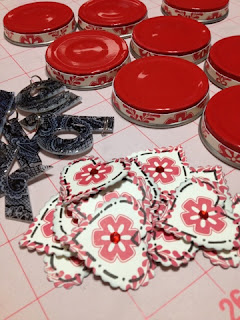
The charms, paper hearts &
baby food jar lids all done.
My husband used red vinyl to
cover the jar libs.  pretty nifty.
 
I made brown Sugar Scrub to fill each jar. 
As a tag I used business cards printed
here at home with the Sugar Scrub recipe
as well as a simple Valentine's Greeting. 

Because the cards were so long I
opted to score the card just below the
greeting to fold it under and make it shorter.
 
***
Brown Sugar Scrub Recipe:
 
 1Cup Brown Sugar
1/3 Cup Olive Oil
2  TBS Honey
 
Mix it all up and put it in a contianer.
 
Original source:
***
 
I know one of the
ladies gets my blog updates so,
Bea, PLEASE act Surprised lol!
 
Happy Valentine's Day
Crafty Friends!

Thursday, February 7, 2013

Have you tried Zentangle?

I've recently come across Zentagle and I've always doodled but this is much much more. It's relaxing and interesting and there is no wrong way. I've finally completed a Zentangle I've been working on for a couple weeks. Aww... Success.

Pages