Thursday, August 29, 2013

Teddy Bear Picnic

Today was the first day in months I sat down 
and thought, "What am I supposed to do?"  
No list of crafts or projects that need to be completed.  
Yet, there are a few I know I need to do, 
but are not in need of immediate attention.  
I was relieved though a little confused.

This past summer, I worked on 
everything we needed for the birthday party.  
I choose Teddy Bear Picnic since it speaks 
to all children and adult and it would go 
perfectly with a BBQ style party.   
The girls thankfully have just in the past 
month fallen in love with Minnie Mouse and it's
 still not a priority to do character themed parties.   

After talking to my mom about the theme I 
wanted she offered her beautiful 
back yard as the location.   I was thrilled 
and just needed to get a move on.  
 In May I started planning and 
purchasing items as I found them. 
Checkered/Gingham items are hard to come by after
 Independence Day.  In June I started on the details.  
In July I was lazy but still working :), it's so hot here.   
First of August I was still finding more items 
I wanted to add to the party.   The one items that 
took me forever to complete because I just 
could make myself do it was the banner 
and of course it's one thing I didn't get a photo of :(. 

Welcome to the PARTY! 
Justin worked hard that morning getting 
the sign ready to welcome guests. 
He did such a great job!


Our Welcome Table. 
All little guests had the option to pick 
bear ears, party hats or both. 
Treat Boxes had small coloring books, 
lady bug bubbles and crayons inside. 
Just in case we had older guests we had treat bags 
with true fact books, puzzle balls and bubbles. 
We used the large teddy bear painting on the 
left for our pin the bow on teddy game. 


Our little guests enjoying the slide. 

We invited two beary important guests to 
the party and the kids loved cuddling with them. 


Felt ears were by far my favorite detail, 
but the hardest project. 
A friend helped me attach them to the headbands 
one afternoon and has made me swear no more ears, haha.
There were so many steps in the ear making process that I agree. 
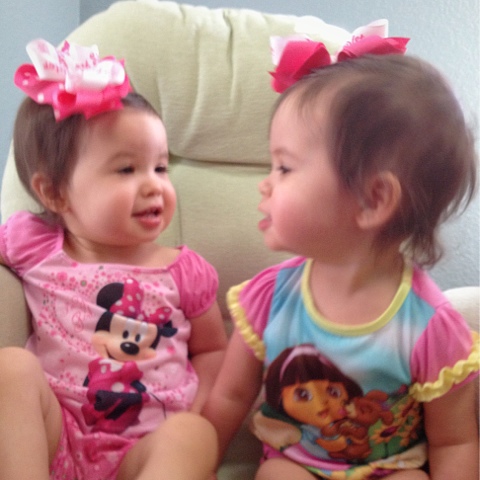
For the girls theirs were the only ones with bows.  
They had matching bows for their ears and hair, 
to help us all see who was who.  
Ava in pink and Olivia in green. 


As an added activity and gift for all our little 
guests they were able to dress their own 
teddy bears with felt vests, party hats and scarves. 
This was a last minute add on activity. 
Ava trying to find Olivia, "You forgot your ears!"


We did hamburgers & hot dogs as our main meal, 
with regular BBQ sides like potato salad, 
pasta salad and chips.  As an added touch I made 
lady bug crackers, (Ritz crackers, cherry tomatoes, 
cream cheese, olives and chives.)

And I couldn't help but make Teddy Bear Trail mix.
Honey Combs, Teddy Grahams, 
Gold Fish, Pretzels, & M&Ms.

Another late addition to the party 
was a pull-string lady bug pinata.
The kids loved it.

And you can't have a birthday party with out Cupcakes! 
I did decorate the cupcakes myself and I am 
beyond happy with how they turned out, 
funky daisy flowers and all.  
I ordered sugar lady bugs and bumble bees to add on top. 

Candles for the birthday girls! 

Our cupcakes and ice cream table.
We did small cup ice cream with 4 
different flavors to choose from. 

Our birthday girls blowing out the candles.
Yes they did it all on their own. 
Don't you love Daddy's hat?

Olivia

Ava

 Elisabeth with Olivia with her very lovely icing face.

Papa, Ava, Olivia & Nana. 

Our big furry guest exhausted after the party.
How they got like this no ones knows.

The party was wonderful and everyone had a blast. 
We took so many photos it's hard to share them all. 
It's two weeks later and I still feel like those bears.

Happy Birthday to my beautiful little girls, Olivia & Ava.
Thank you all who shared in their special day with them.

Friday, May 17, 2013

Washi This, Washi That...

So many possibilities!
I love to decorate home decor and alter items.
Washi tape is a new favorite medium.

We recently did a busy bag swap at MOPS 
and it got me thinking about what else I 
could do to keep my {gasp} toddlers busy.
They are getting so big :(.   
For Christmas we bought them a 
quilted type fishing set and the love it.
So I thought miniatures would be perfect.
I lined the bottom of the tin with blue 
washi to make water as well decorated the
 top with washi tape in the colors of the fish.  
I then used a cricut image to top it.  
I used Paper Doll Dress Up and Animal Kingdom.
I made a template for the fish 
with chipboard and traced it onto felt.  
I just cut, sew and stuff and tada fish!
I used a small dowel for the fishing rod 
attached bakers twine, and asked my 
husband to sew Velcro on the end. 
These were perfect for the diaper bag. 
We put them to use on Mother's Day and the girls loved them.

Wooden peg dolls are adorable but with 
washi tape dresses they look so much fancier.
I drew on the faces then went to work with dress designs.

I found this little shelf at Marshall's on clearance a few weeks ago.  
Had it gone where it was intended it might have stayed just white.
But it didn't work there so I am using it in my craft room instead.
The washi tape just started wrapping its self lol.  

I did my light switch to match of course.

I used a bath tile to create this little piece of art.  
The background is all washi tape.  


What have you washi taped?


Washi Cards

I love that Washi Tape can be used just like ribbon. 
You can make flowers and even bows with it!  
Amazing stuff!
Here are the cards I've created.


For our National Scrapbook Day Crop I made 
each cropper a mini card set to take home.  
 These 3x3 cards were perfect projects to work 
on while in the living room watching Tv.  
Remember washi tape looks best on a light colored back ground.

Strips of washi tape going down with 
banner style ends help embellish a card.

Doing an actual banner is even better.   
You can also write & stamp on washi 
tape when you use permanent ink.
I used Stazon ink to stamp the little presents here.


This has been a card posted multiple times on 
Pinterest and I loved the idea so much I had 
to do my own.   I love it, so simple and adorable.   
I would love to make more for our Christmas 
cards this year, however I'll have to use 
some thing else to make the ornaments .  
Inspired by this card:

Another idea from a Pinterest card.   
Just line up your tape on a piece of 
copy paper and puch out your desired image.
Inspired by this card: 

I hope these inspire you as well. happy crafting!

Washi Layouts

Although most our class will be decorative items for
home, washi tape is fantastic for scrap booking.

I did three layouts using washi tape in multiple ways 
with inspiration from layouts posted on Pinterest. 

Looking at colors these inspire me most right now.  
How could they not with twin girls a house full of pink.  
This a photo take for their first birthday. 
Adding strips as part of the back ground is easy
and it engages the eye to both the background and photo.
Inspired by this sketch: http://stucksketches.blogspot.com/2011/08/august-bonus-sketch-1.html


I loved the way the washi tape framed the photos in 
the inspiration layout and just had to try it myself.  

With this layout I also added a little bit of doodling/zentangle around the circles.
Inspired by this layout:
http://pinterest.com/pin/45880489926707205/

Thanks for looking. 
Happy scrapping'!


Monday, May 13, 2013

Washi Tape Class!!


Getting ready to host a washi tape class and 
I can honestly admit I'm in love with all things washi!!
Ok ok fine I think I'm obsessed!  Lol!
Last month mom, two friends and I went to CKC Mesa.  
One of our classes was Washi 101 with Queen & Co.
We learned quite a bit like how there's a million different 
designs, it looks best on white or light color backgrounds,
and you can use it on any solid/non porous surface.

The possibilities are endless!  
Durning our class we'll be exploring some of those possibilities.

Class Project Include:
~ Note Book (Learn to make 2 types of washi flowers.)
~ Photo Frame (There are 4 different crafty quotes to choose from.)
~ 2 x Tea lights
~ Pencil
~ 3 x Tooth Pick Banners
~ 3 x Binder Clips
~ Birthday Tag (Learn to make a twist tie)
~ 3+ Paper Clips (Not Pictured.)
~ 2 x Clothes Pins (Not Pictured.)


The ladies in our class will be able to choose from many 
many styles of tapes as they have access to my personal 
supply as well as two other ladies will be sharing theirs.  

When ever I do a class I try to do a run through either on 
my own with the help of a friend or family member.
This time I lucked out and my wonderful mom helped me.
She had a blast and even said she can't wait to take it again :).

I'll be back again soon to show off a few of my sample 
projects using the super cute washi tapes I've acquired.  

*Looks like I'll be posting a little more often 
if my nifty new toy (iPad mini) allows me to.
Have I washi taped it yet? 
No but I have thought about it :).

Tuesday, March 5, 2013

Happy Bird-day to you...

I saw an adorable card the other day using a Dollie just like these and once I remember where I saw it I'll be sure to link you there :).

I made 3 cards with all the same design but slight differences in card bases. Birthday cards have completely vanished from my little stash so it's past time replenish.

I used Stampin' Up's "Love Ya Bunches" set. The set has long since retired :(.


Monday, March 4, 2013

Crappy Day...

A few months ago I ordered this adorable Itty Bitty stamp set from Unity Stamps and I love it! I'll be adding these to my stash for later use.


Friday, February 22, 2013

Mini Cards in Reused Cigarillos Box Class

Saturday, March 9, 2013
Class cost is $12.00
Mini Cards in Reused Cigarillos Box Class
           Cards would make a perfect addition to a small gift or just a quick note to let someone know you care.   The box can also be reused for a gift later on or as a whole set.   Cards are approximately 3x3 inches.    Most of the prep work is done for you in terms of card bases and layers, however during this class you’ll be stamping, embossing and coloring your card images as well as making your own flowers.   You will have your choice of flower colors ( die cuts will be pre-made).  Please bring old scraps to cover the inside of your boxes as wells as for embellishing the top of your box.  
Suggested Tools:
  • Double Sided Tape
  • Liquid Adhesive
  • White Gelly Pen
  • Glue Dots
  • Paper Trimmer
  • Paper Piercer
  • Sanding File/Block
  • Brown or Black Inks
  • Scrap Papers (From previous projects you may have)

Full Set: 8 Mini Cards &
2 Cigar Boxes (attached)

8 Mini cards
Thank you, Friends, Thinking of You,
Miss you, Happy Holidays, For Baby,
Best Wishes, Happy Birthday
2 Cigar Boxes (attached)
"Simple Notes" tag was made using scrap paper.
Side view of boxes.

Inside the Boxes I used scrap
paper to line to tops and bottoms.


Thursday, February 21, 2013

Getting messy...

It's been so long since I walked into my craft room and came back out with my hands all inked and messy.

I'm currently working on a class with mini cards that fit into a mini cigarillo boxes. I'm nearly done prepping for that class and have just a few more steps that require most of my work space.

In the process of cleaning I got this idea in my head that I just had to play with a few new masks I bought for glimmer mists.
It's been so long since I had my hands this inked that I kinda panicked when it didn't simply wash off.

But then as usual my husband came to the rescue. He told me, "Look you're almost back to the old you!" That being said made me feel so good. It's been a long 2 years. Yes the girls are only 18 months but while I was pregnant I began to lose myself. Maybe I am getting back to the old me with a new normal.

Photos of the class (no glimmer mists though) should be up soon, but for now I'll leave you with a couple photos of my little mess and my little Cupcakes.


Wednesday, February 13, 2013

Happy Valentine's Day

Our second crop this year is the day after
Valentine's Day, so I wanted to make a
special gift for each lady attending.
Something personal, something sweet
and something to pamper them.

My last post was my Zentangle piece
and I've been thinking about
shrink-a-dinks so I combined the
two to make little charms of art.

Each piece is the first initial of one
of the ladies. I used repeating patterns
in them all to make them a bit easier
and faster for me to complete.
Two have special designs.
The letter D for my mom,
has cupcakes :). And one of the
Ks has a butterfly for me.

Below is a mini tutorial on the steps
I took to complete the charms.
As well as the individual photos of the
other items I used to complete the gifts.
 
I used 4 inch letters and a pencil to
trace my template on to shrink-a-dinks.
 
I then cut out each letter.
 
I used a thin Sharpie
 to doodle my design.
 
I baked the shrink-a-dinks just as the package said.
2-3 mins at 300 degrees with a piece of parchment
paper under a the item and one on top.
 
Size difference from unshrunk to shrunk.
 
Once the initials were baked and cooled I then put
a thin layer of glossy accents on top to
make sure the sharpie wouldn't rub off later. 
 
The finished initials with jump rings attached.

Chalk board vinyl labels.

The charms, paper hearts &
baby food jar lids all done.
My husband used red vinyl to
cover the jar libs.  pretty nifty.
 
I made brown Sugar Scrub to fill each jar. 
As a tag I used business cards printed
here at home with the Sugar Scrub recipe
as well as a simple Valentine's Greeting. 

Because the cards were so long I
opted to score the card just below the
greeting to fold it under and make it shorter.
 
***
Brown Sugar Scrub Recipe:
 
 1Cup Brown Sugar
1/3 Cup Olive Oil
2  TBS Honey
 
Mix it all up and put it in a contianer.
 
Original source:
***
 
I know one of the
ladies gets my blog updates so,
Bea, PLEASE act Surprised lol!
 
Happy Valentine's Day
Crafty Friends!

Pages